First Weld - Garage Shelves
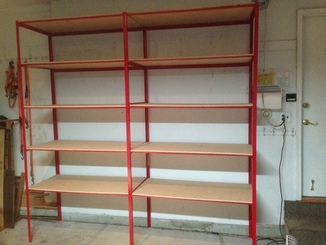
Welding is one of those mysterious skills that kinda seems like magic until you actually do it. A few years ago I took a welding class from the TechShop and convinced myself it wasn’t magic, but it was still mighty intimidating. Recently my brother bought the Harbor Freight special welder and assorted supplies and we decided that we’d give it a go. The project of choice was a big set of shelves for my garage. After pricing things out I realized that this is not a cost saving do-it-yourself project, but it more or less breaks even and getting to weld something was the real point. ’ Following a tip from a fellow Ingress player, I looked up a shop in Denver that sells metal stock remnants by the pound called Altitude Steel. I bought new 1.5” x 1.5” angle iron for the legs of the shelves and then found some flat tubing about 1” x 0.25” in the scrap section. This tubing was pretty rusted, but I had read that it was possible to clean things up pretty well, and since I was already pushing my budget, decided to go with it. 75 cents a pound is a pretty good motivator.
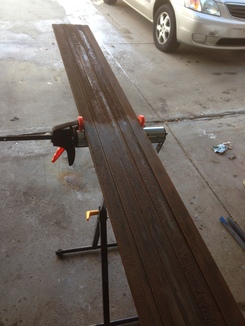
To clean those bars up, I took a wire wheel bit in my drill and cleaned as much of the rust as I could off that way. Pro tip: while that 2” wheel looks like the right size since the bars are pretty narrow, the 4” goes a whole lot faster. Also while it seems natural to do one bar at a time, clamping a set together is more efficient. Once the loose rust has been cleaned of it was time to resort to some lovely stuff called Naval Jelly. This is mainly phosphoric acid in a goopy jelly form which chemically dissolves the remaining rust. My first go was to spread the stuff on using a heavy duty paper towel but this ended up leaving big globs that would drip onto the floor. Paint brushes were made for this sort of thing and work 100 times better. It probably took me 4-5 hours total to clean up these 10 10’ bars which was not in the original schedule.
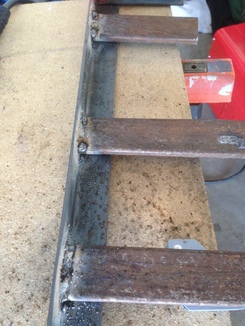
With the metal ready to go it was time to start the actual welding. I remembered the theory but my first few welds were terrible. I was vaporizing more metal than I was connecting. After fiddling with a bunch of settings and consulting the great Internet oracles, I discovered that my conservative tendencies to use the minimum required was biting me. I was not feeding the wire in nearly fast enough. Turning the dial up to 8 allowed me to lay down a nice bead of welded metal. There was still lots of spatter, which I gather is a bad thing, but at this point I was just ready to move on. As long as things wouldn’t fall apart, it was good enough.
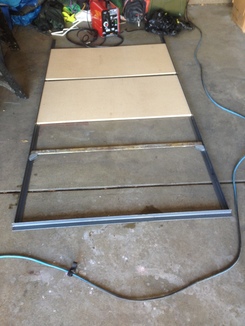
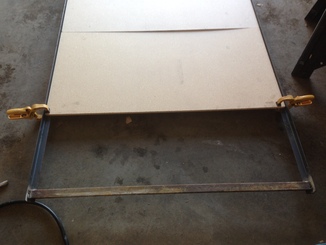
The next challenge was arranging things and keeping them square while I did the attaching bit. Things were too large to simply clamp down to table. My solution was to use the wood for the shelves as very large right angle jigs. I don’t trust lengths to be exact, but if things aren’t square then they don’t ship well, and companies care about that sort of thing. It’s not in the photo but before welding a took a tie down strap and used that to keep the two leg pieces snug against the shelving. With that set, the traditional magnetic welding square (double checked with my framing square) convinced me that everything was in place.
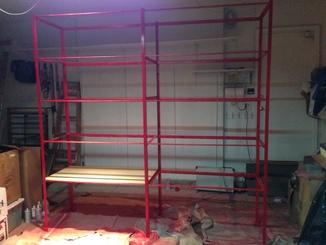
From there, it was pretty much repeat, repeat, repeat, and repeat again. My welding skills definitely got better over time, but are still nowhere near pretty. And to be honest, with that much repetition, I valued utility over beauty pretty quickly. I also stopped caring about pictures so you’ll just have to use your imagination to see a bunch of metal bars gradually becoming the two towers of five shelves with a total dimension of 8’ x 8’ x 2’ you saw at the start of the post.
My last comment is about the miracle of spray paint. I am astounded how well it covered up the rusty metal. You can see the rough texture still, but that glossy red makes it irrelevant. The tip to go with the remnant metal was only a great one because I was planning on painting. Otherwise, my new shelves would have looked like remnants from some dustbowl farm equipment.

