
This Old House
The biggest project (or program for you project managers out there) that has occupied my time over the past five years is fixing up the fixer-upper we bought in Nov 2000. All in all I’ve got to say I’m pretty happy with the way it has turned out. There are certainly some things I look at and wish they had been done a little differently, but I can’t tell if other people look at them the same way or if it’s just crafter’s remorse. In any event, here are some before and after shots to give you an idea of just how far our little home has come.
Great Room

The first step in just about every room in the house was to paint over the existing chalky pink color. We went with “chino” as our widely used neutral and threw in accents such as the the dark red wall at the end. We had the wood floors refinished (one of the few jobs we didn’t do ourselves) and added that little arch window in the wall separating off the entryway.
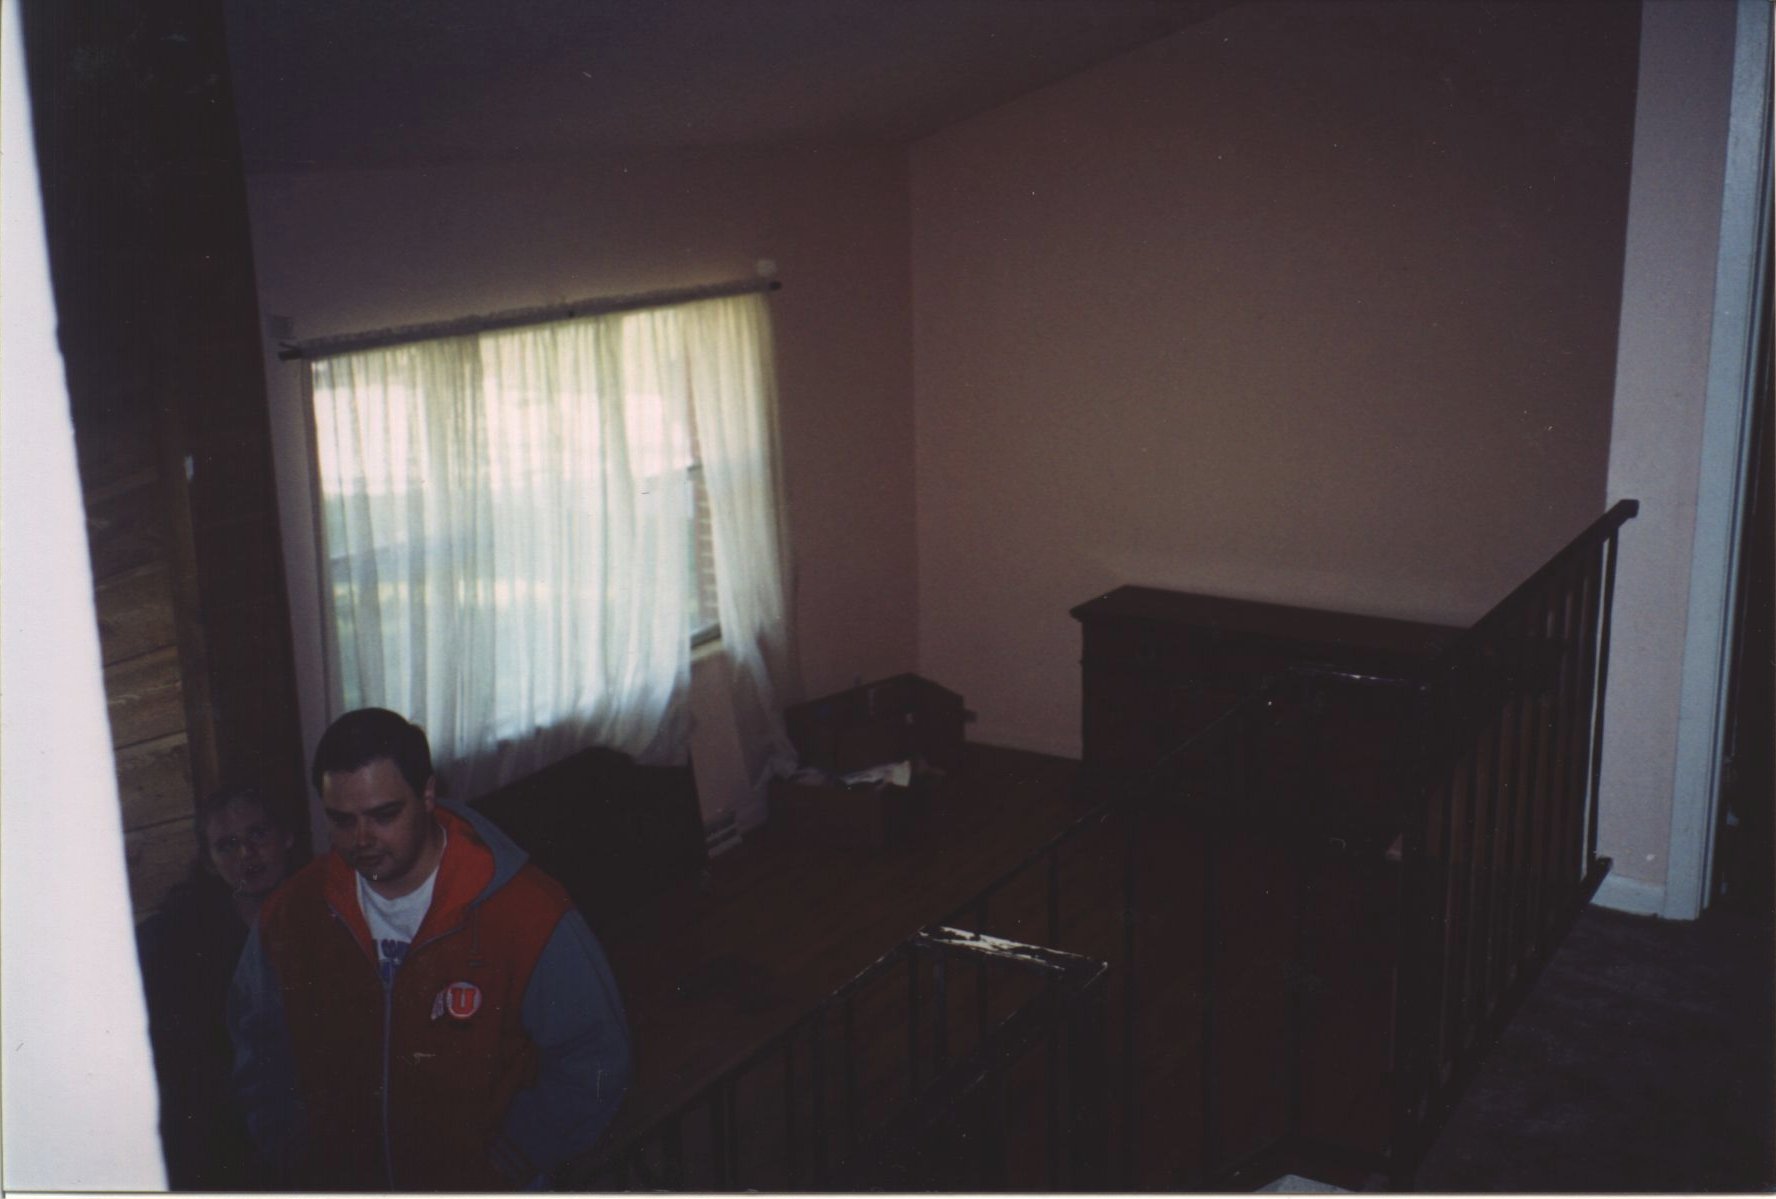
Staircase

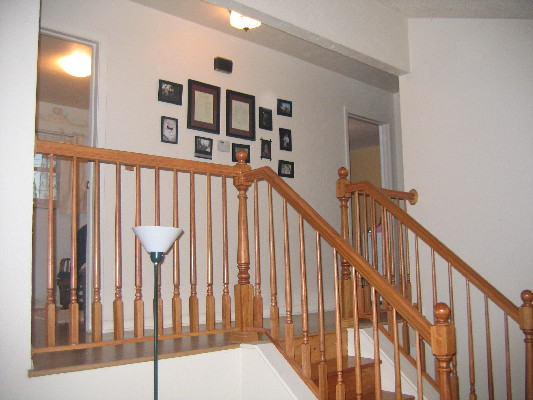
The biggest change here was obviously the replacement of a black metal handrail with a wooden one. The individual parts were bought preformed, but I did the rest of the assembly and it is probably one of the projects I am most happy with. We also ripped off the mirror/cedar panelling on the upstairs landing and under that disgusting carpet was a lovely wood floor waiting to show its face.
Kitchen
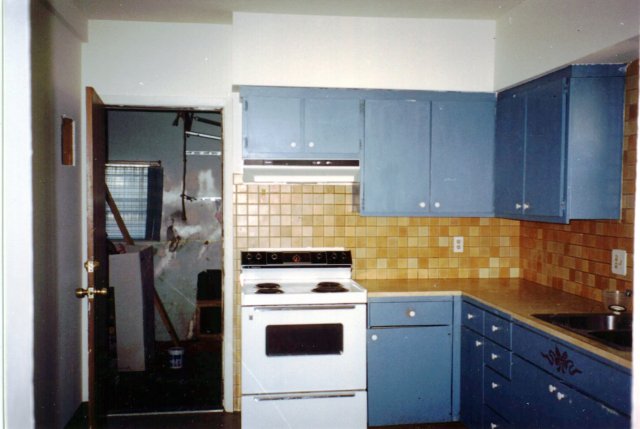

Typically when people fix up a house, they gut the kitchen. We could never decide what we wanted to do until we were basically ready to sell and at that point weren’t motivated to invest a bunch of money. So we just did a little covering to change the look of the room. Repainted the cabinets, replaced the hardware and relaminated the countertop. This was a project that had me scared, but turned out to be easy. The old formica was scratched but still sturdy, so we bought a new sheet of formica (~$150) and spent a long weekend carefully measuring, cutting, and routing and by the end it turned out pretty great. A dramatic, if not complete, change for a couple hundred bucks total.
East Bedroom


Here we decided to cover the existing hardwood because I don’t like wood in bedrooms. Other than that it was a pretty straight forward repainting and then had someone install some new carpet. You can also see the ceiling fan we put in.
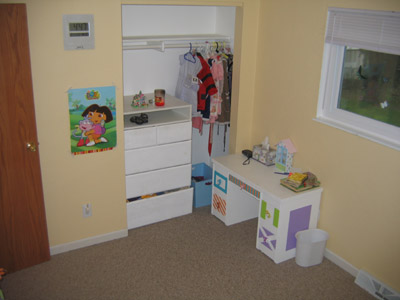
Middle Bedroom
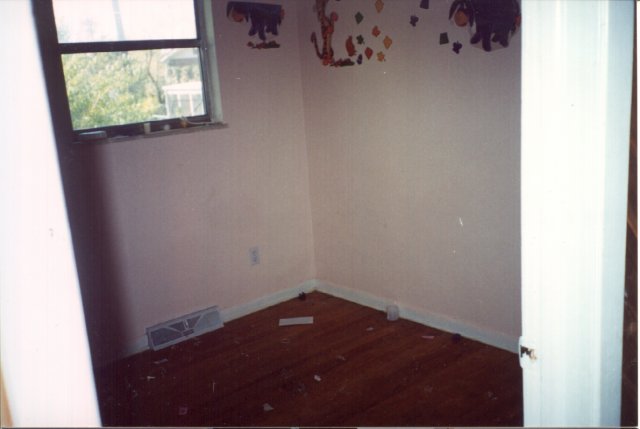
This was pretty simple too. Repainted to a gender neutral green/yellow combo. Left the hardwood exposed figuring that a weebee would get a lot of stuff on the floor that we didn’t want to clean out of carpet (and we were right). You can’t see it but we also built some shelves into the bottom half of the closet since baby clothes only hang down about a foot and a half from the rail.
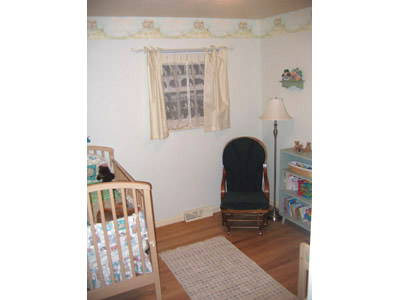
West Bedroom
You get the idea. New paint + new carpet = new room. We built those drawers in the closet (still haven’t fixed that bottom drawer to close completely). The little desk was a side project too (mainly Heidi’s). Someone had that desk out on the curb with a sign that said “take me”, so we did. Again, some fresh paint and hardware replacement (the knobs are plastic Care Bears impaled on a screw), and Katya has a desk that should do the trick for quite some time.
Upstairs Bathroom
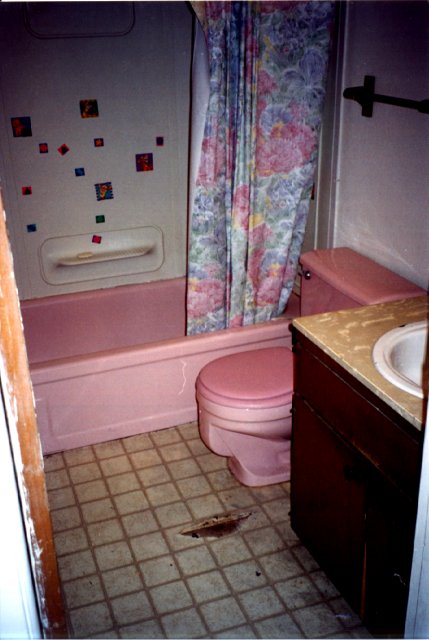

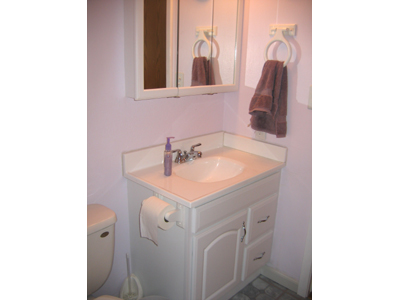
Pink bathtub. Need I say more. It was actually in good condition and we did end up using it for quite a while until we got to this room, but really, pink? Replacing it was surprisingly difficult though. The length of the bathtub was exactly as wide as the room was, no problem right? Well, unless you can slide the thing straight in (which you can’t) you have to take out part of the wall to get yourself turning room. Most of that wall was being replaced with moisture resistant greenboard anyway, but wrestling the bathtub for a couple of days is a lingering memory. Only other comment here is that the peel and stick vinyl tile has worked just fine, although we did replace the subfloor before putting it down.
Downstairs Bathroom
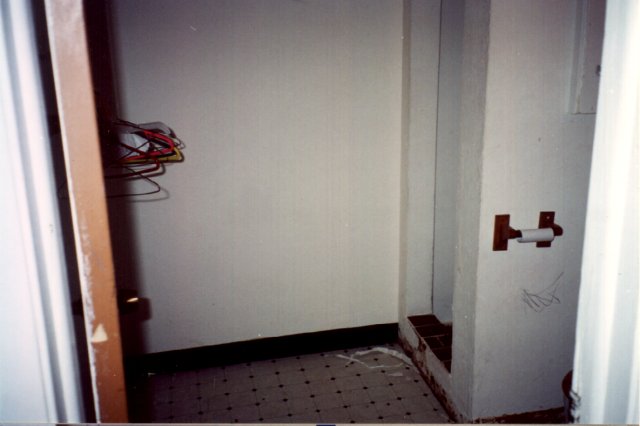
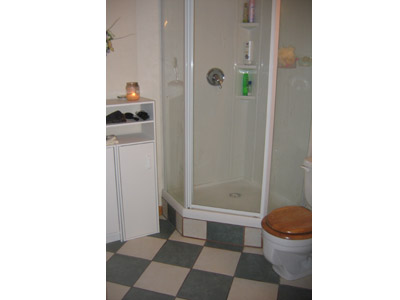
This room was a lot of fun. The built in shower had to come out (holes in the interior walls) and demolition is always fun. I got to do a fair bit of plumbing moving the shower head too. Installing the new shower was pretty easy, with the exception of assuming that the walls were square. Also, it’s raised to allow for a pipe to link the drain in the shower floor to hit the drain in the concrete below. The ceramic tile was another remarkably easy thing to do. Buy those little plastic spacers and lay everything out as best you can. Then go around the edges trimming pieces to fit. Lots of repetition but nothing difficult, and in the end, it looks cool.
Family Room
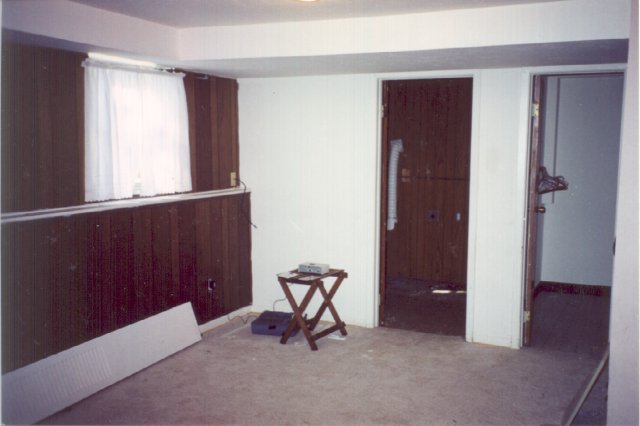
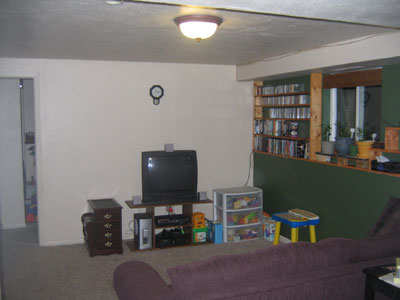
You can’t see it, but the worst part of this rework was removing the wall paper under that wood panelling and on the wall behind the picture. The only upside is that I could work on it while watching hockey. Other than that, another pretty simple repaint, recarpet. I did build in some shelves on the ledge there for media and decoration.
Computer Room
Well, I can’t find a picture of this room completed, so I’ll take one the next time we have the house in showing condition. There isn’t much to show though New paint, new carpet. We did decide to paint the ledge a nice bold blue and put in some shelves painted the same color.
Misc
Windows: We ended up replacing all the windows in the house in three phases. We decided the upstairs was the most important (heat rising and the bedrooms being there) so we paid Sears to do those. Waaayyy tooooo expensive. True, if anyone ever puts a ball through our window they’ll come out and replace it, but for the price, we could replace every window a second time going with someone else. For the windows on the main floor we went through Home Depot and their contract installers. Much more reasonable cost and there is no appreciable difference (to me) in the window quality. But, by the time I had watched two installers do their work, I was pretty sure I had the drill down and for the downstairs windows, decided to buy the windows from Home Depot but install them myself. It was a fair amount of work and I didn’t handle the exterior siding well (cracked it in a number of places that had to be caulked later), but I got the job done. Assuming I could figure out how to treat siding nicely, I would totally go this route every time. It was less than half the cost of Home Depot installing and not even a quarter of the cost of Sears.
Finish Work/Trim: I ended up replacing the baseboards and trim in just about every room. There really isn’t much to it, once you accept the fact that your walls aren’t really at 90 degrees to each other. To have things line up right, you really need to start in one corner and measure/eyeball each joint to see how far off expectation it is. To have it look perfect, you really need to cut a piece, try it in place, then carefully file/recut the piece till it’s right. I started with a hand back saw and a miter box which worked, but ate away at my patience so quickly that I’d get sloppy by the end. My table saw made the work go a lot quicker but the real tool for the job is a miter saw. Still, there isn’t much that won’t be corrected by caulk/paint as long as you’re not going the real wood route.